Quickstart
Perform landform shaping in your browser, no install required. This guide walks through the workflow: importing a surface, defining areas, and submitting a shaping job.
For a quick outline of the workflow, watch this short video.
Note
Goals of landform shaping
As mining or earthwork operations progress, the areas they disturb must be rehabilitated and returned to a sustainable state. Landform shaping is part of that rehabilitation, and it can become a significant cost if done inefficiently. This tool is optimised to deliver a balanced and minimal cut and fill volume while still achieving the targeted landform angles.
The shaping results can be used to direct and schedule shaping operations, assess rehabilitation liability, and report on the shaping requirements for mining and earthwork operations.
Importing a surface
A surface represents the existing terrain you want to shape. Import it first so the tool has a base to work from.
Supported formats
.00tVulcan triangulation.dxf- the triangulation is read from
Face3D(3DFACE) entities, or fromPolylineentities with the polyface-mesh flag (128) set. Other entity types are ignored.
- the triangulation is read from
.sfgVulcan grid.csvcomma-separated heightfield (x,y,z)
How to import
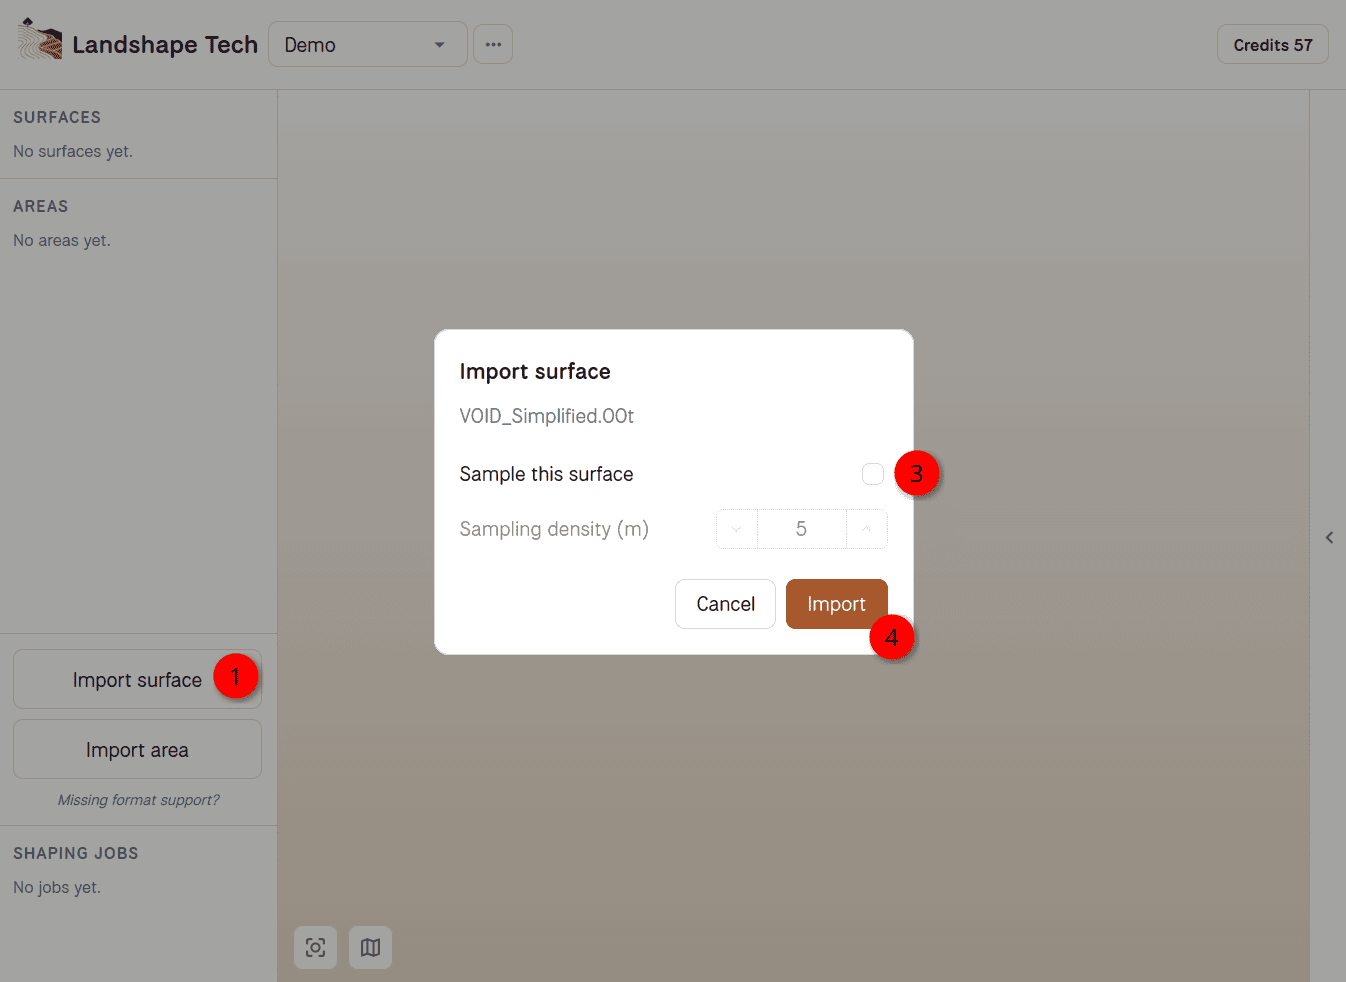
- In the Surfaces section of the sidebar, click Import surface (1).
- Select your surface file.
- In the dialog, choose whether to sample this surface (3) and, if so, set a sampling density (m). Sampling reduces the point count for faster processing; a smaller density keeps more detail.
- Click Import (4).
The surface appears in the sidebar and is rendered in the viewer. You can toggle its visibility at any time.
NoteA
.sfggrid is imported directly without the sampling dialog.
Importing areas
Areas mark the regions of the surface you want to shape. Each area is a polygon; you configure its shaping parameters separately.
Supported formats
.dxf- the polygons are read from
LWPOLYLINEentities, orPolylineentities (regular polylines, not polyface meshes). Other entity types are ignored.
- the polygons are read from
.arch_dVulcan shape format.csvcomma-separated list of polygon vertices
How to import
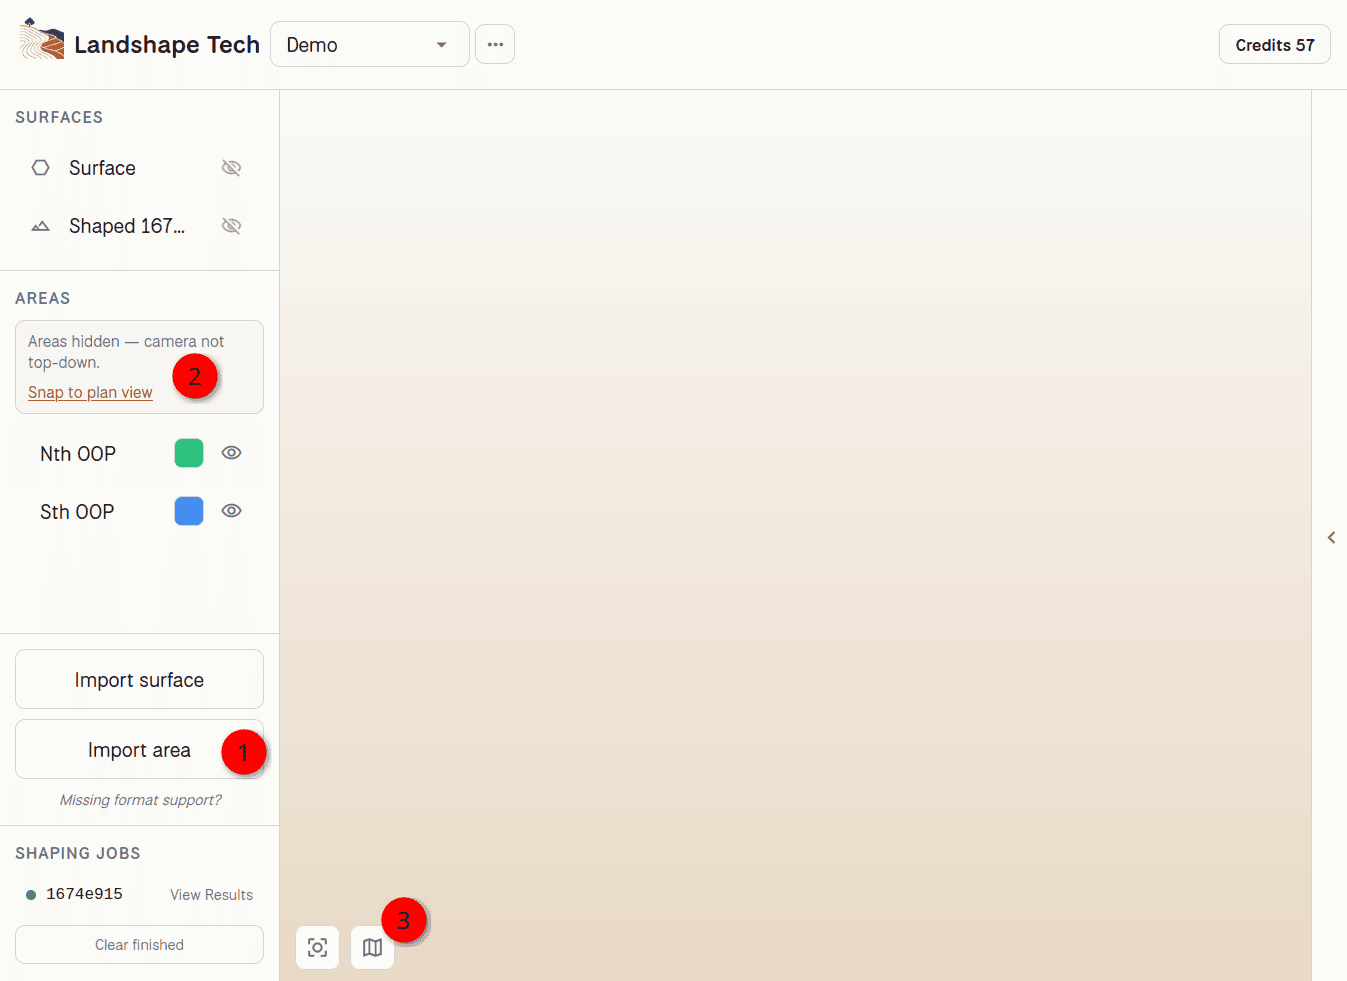
- In the Areas section of the sidebar, click Import area. (1)
- Select your area file.
- Click Open.
Each polygon becomes an area in the sidebar and is rendered in the viewer when viewing in plan view (2/3). You can rename an area by clicking its name, and toggle its visibility or tint from the sidebar.
Create shaping job
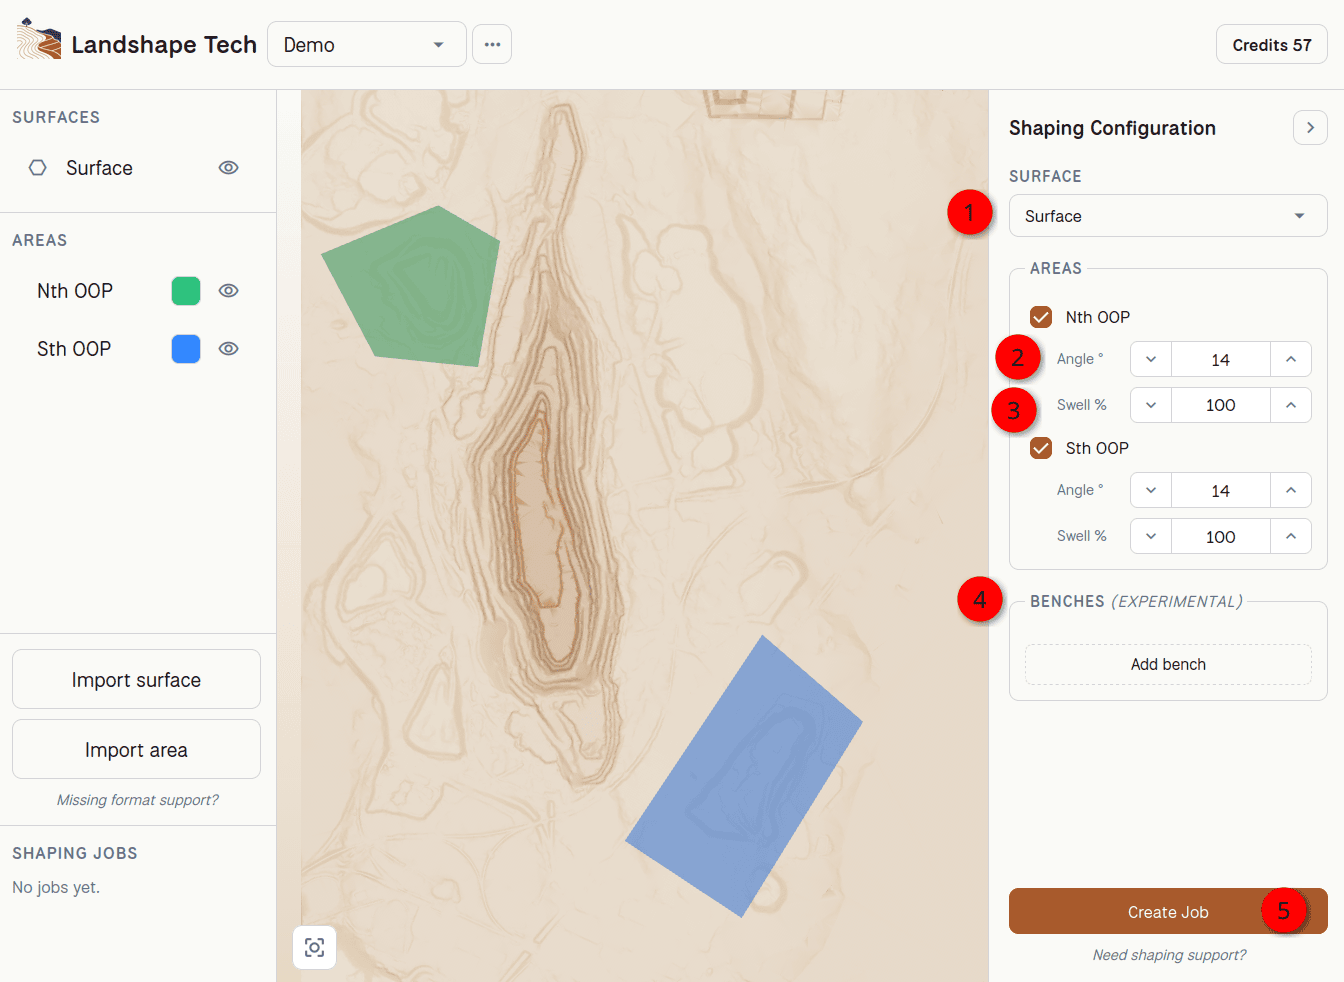
To create a job, configure how each area should be shaped. These settings live in the Shaping Configuration panel on the right.
Surface
Select the surface to shape from the dropdown (1). Only imported trimesh surfaces are available for shaping jobs.
Areas
Each area has two parameters:
- Angle ° (2) the target grade angle for the shaped slope, between 1° and 89°.
- Swell % (3) the swell factor as a percentage of material.
100means no swell;120means 20% swell. Swell controls how much the cut material is swelled, useful for areas which require rock breakage, for example, on highwalls.
Tick the checkbox to include an area in the job. Unticked areas are left unchanged.
Benches (experimental)
Benches (4) are flat ledges cut into the slope at a given level. Each bench has:
- RL: the reduced level (elevation) of the bench.
- Width: the width of the bench.
Use Add bench to add more, and the close button to remove one.
NoteBench support is currently experimental and requires more validation. Feedback and behaviour reports are appreciated.
Creating the job
When the configuration is ready, click Create Job (5). A summary shows the surface, areas, and benches before submission.
Shaping job outcome
Monitor job
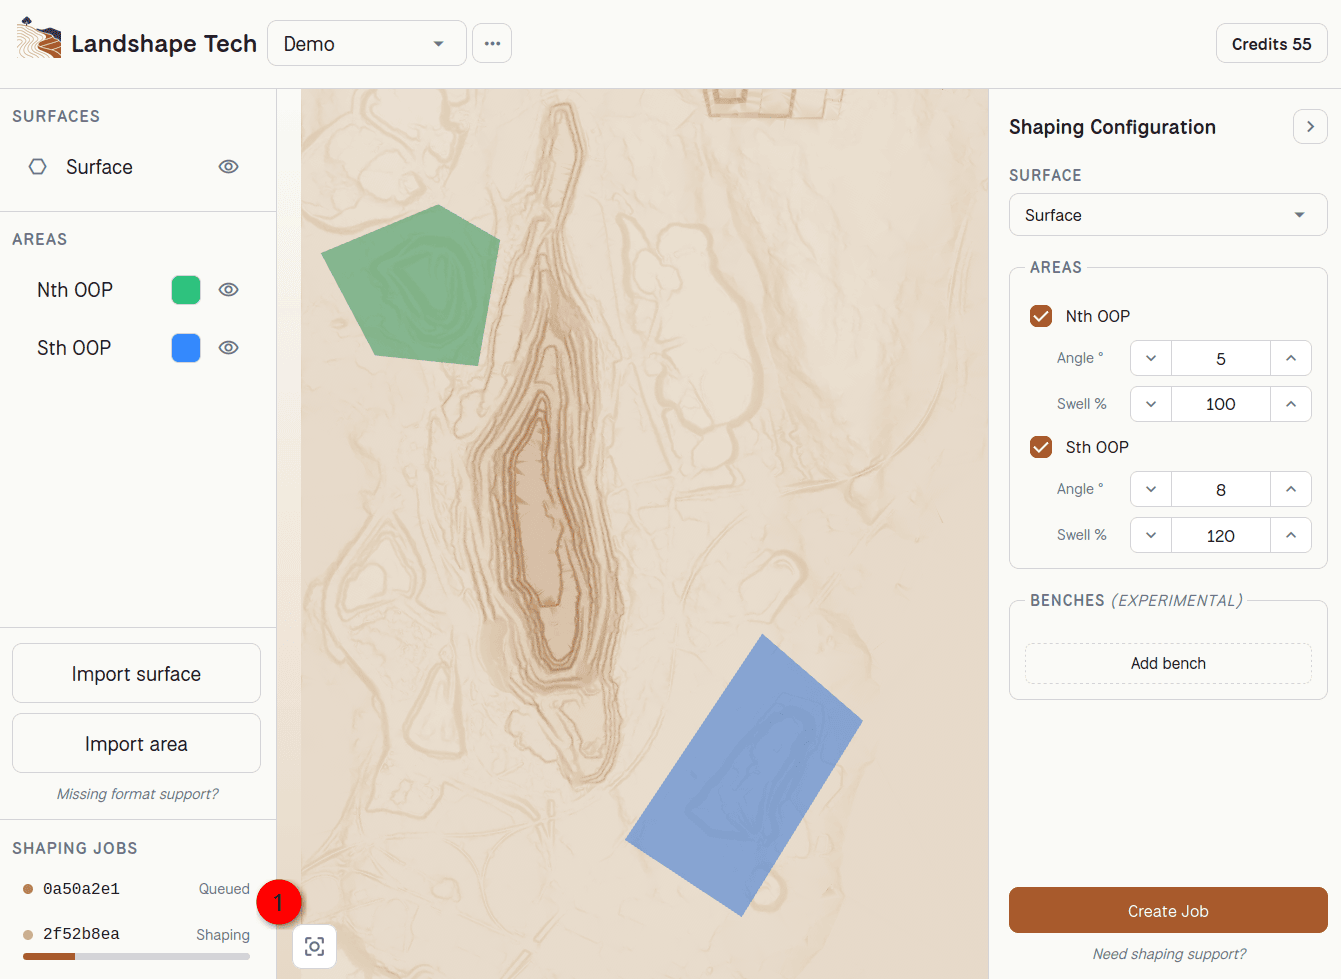
Track job progress in the Shaping Jobs section (1). Click a job to view its outcome and results.
Job results
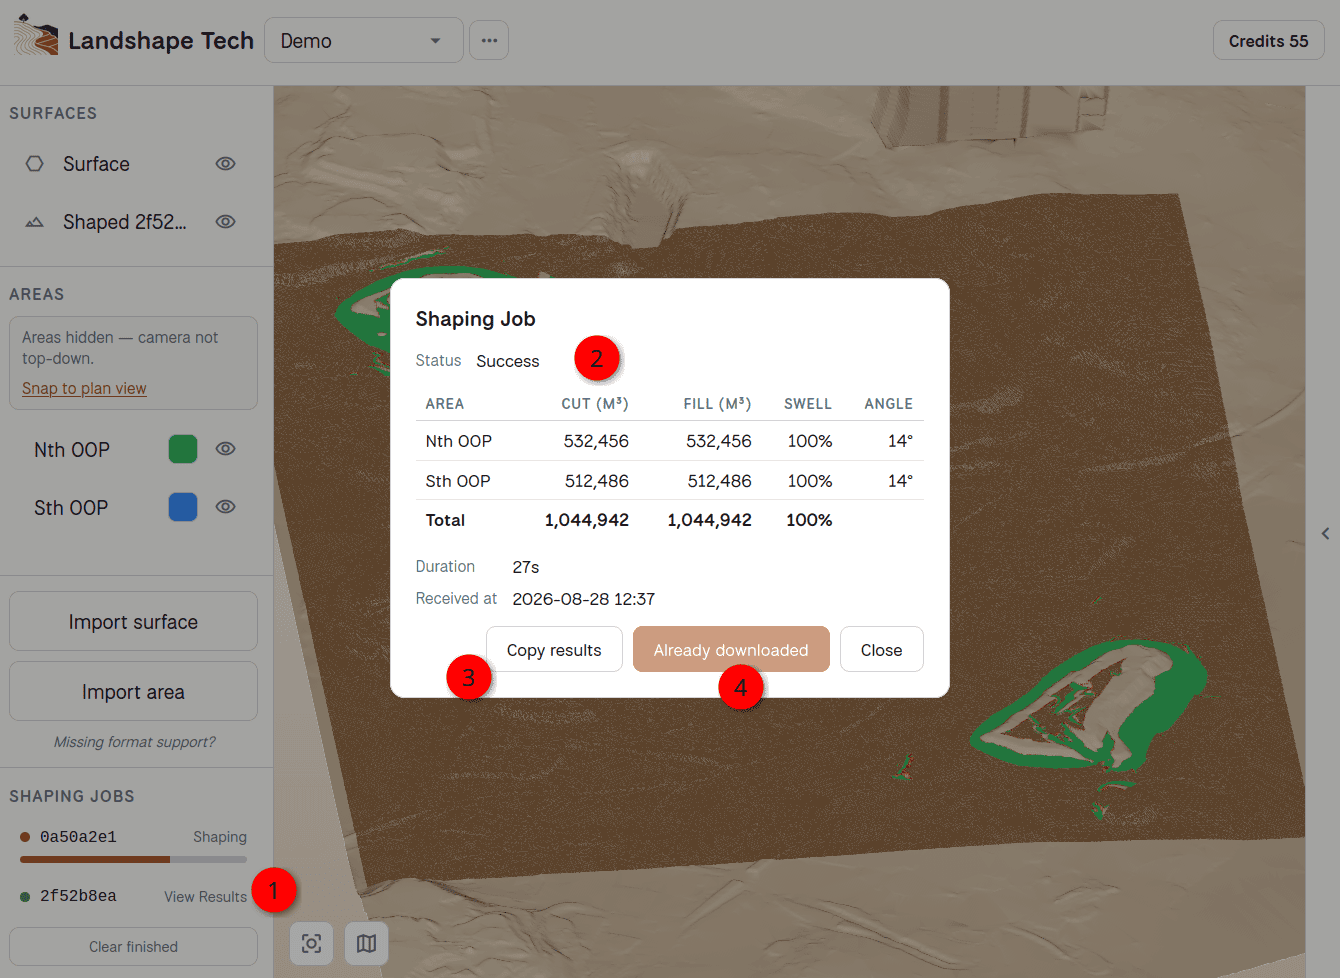
Once a job finishes, click it to inspect the results (1). A successful shaping shows the cut and fill results in a table (2), which you can copy (3) and paste into other applications such as Excel for reporting.
The shaped surface downloads automatically and appears in the viewport. You can also trigger the download manually with a button (4).
Exporting results
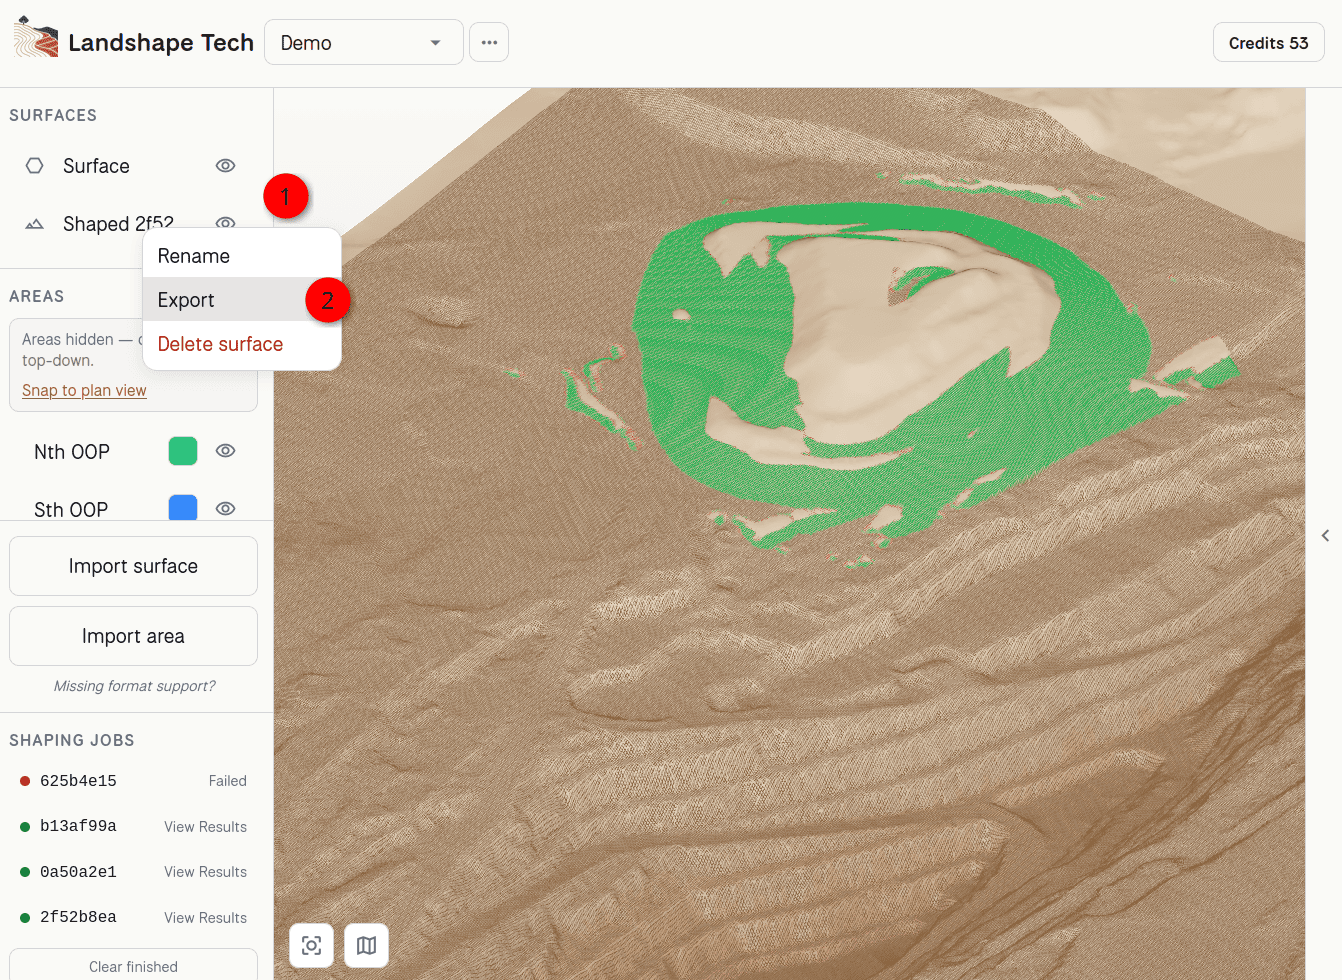
Shaped surfaces can be exported for use in other applications. Open the surface's context menu (1) in the Surfaces section and choose Export (2).
Export options
For a shaped surface, choose one of:
- Vulcan grid (.sfg): the shaped grid as a Vulcan grid file.
- Surface mesh: a triangulated surface mesh, as a Vulcan
.00tor a DXF file. - Contours (DXF): contour polylines at a chosen spacing (m).
Imported grids export as a Vulcan .sfg grid. Surface-mesh format
selection is coming soon.
The exported file downloads to your machine.
Troubleshoot failed jobs
If a job fails, click it in the Shaping Jobs section to open the detail dialog and read the Failure detail. The message tells you what went wrong.
Shaping efforts generally fail in two ways:
- The specification is too constrained, or
- There is not enough surrounding context area.
Tight constraints
When the error states that the specification cannot be met, the target constraints (angle or swell) are unachievable while still balancing cut and fill. In most cases the answer is to relax the constraints.
Because this affects the overall landform specification, you may instead need a modified input surface, for example, one that has material removed with a truck-and-shovel operation. For deeper engineering solutions, contact us for consulting support.
Insufficient context area
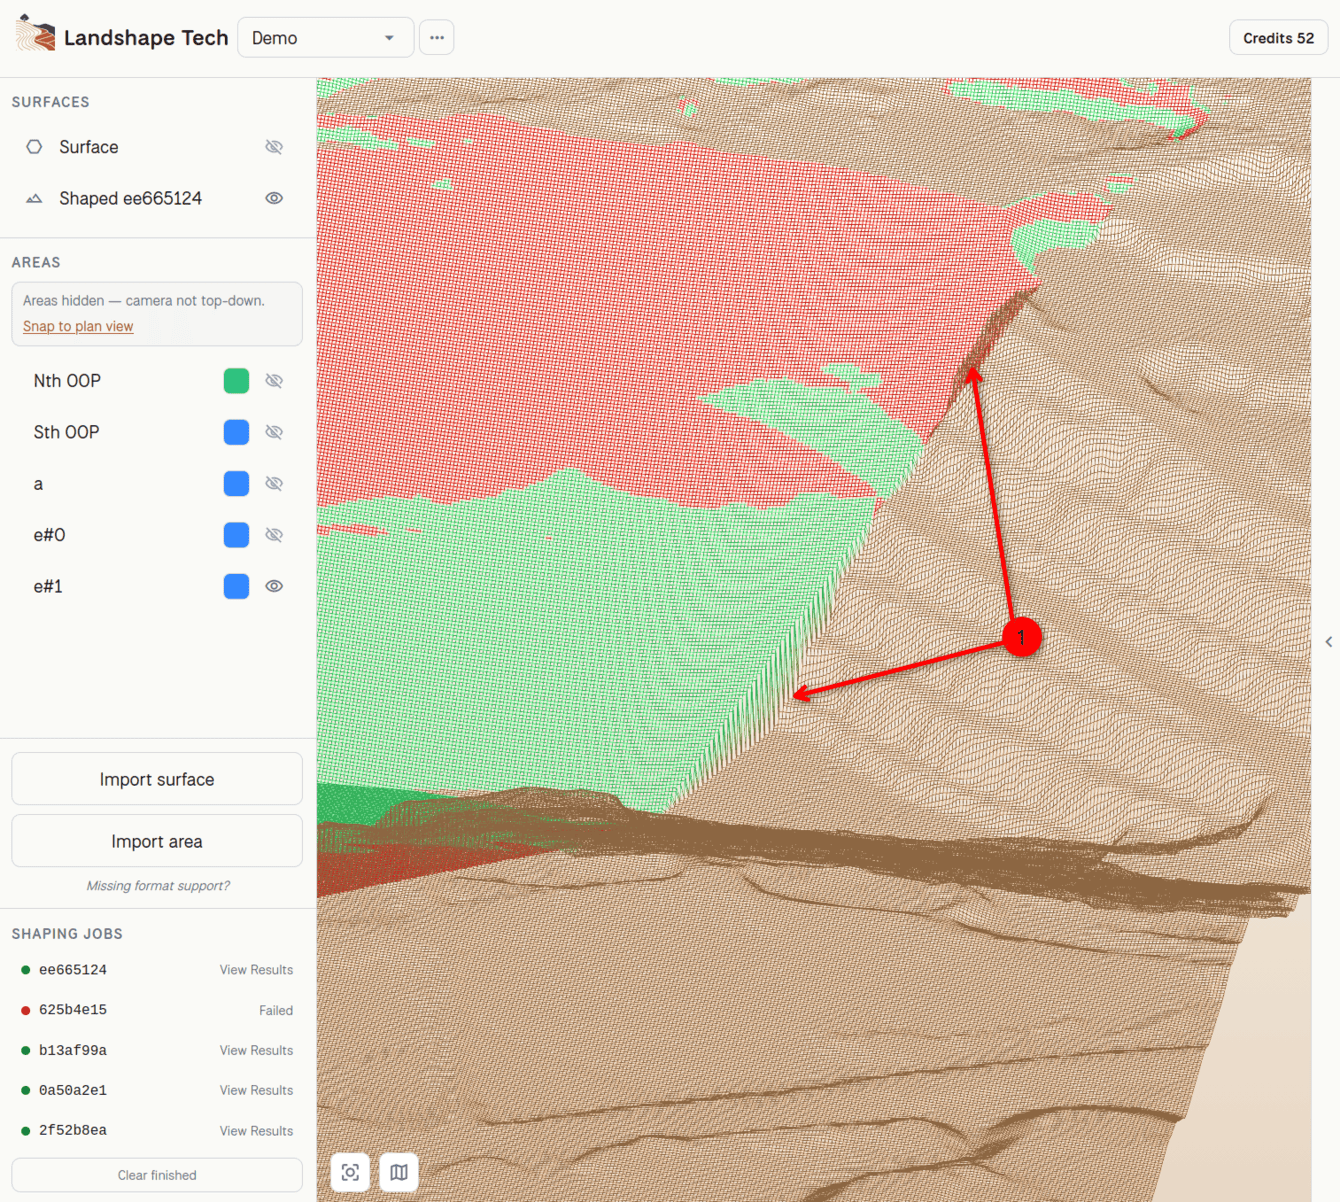
The other common failure mode is a bounding area that does not provide enough surrounding context. The resulting surface will pass validation - it balances the cut and fill volumes and achieves the target angles - but only within the bounding area; it would fail outside it.
This failure mode requires visual inspection of the boundaries, as in the example below (1). The fix is straightforward: enlarge the bounding area to encompass more topography context.
Still stuck?
If the failure mentions an internal server or IO error, or you cannot resolve the issue, contact support with the job details.